“A great building must begin with the unmeasurable, must go through measurable means when it is being designed and in the end must be unmeasurable.”
Louis I. KahnMetiendo Vivendum – ‘By Measure We Live’
Motto of Sir Edwin Lutyens
Introduction & A Little Theory
Intent
I’m going to argue here that dimensioning is a creative act – a detail in service of the idea of the whole; a form honoring the content. We can’t understand “dimensioning” without understanding “measuring.” Measuring is pointless unless our intentions are clear.
Measure what?
Who is measuring?
Why? To what degree of accuracy?
To what end?
How will the measurements be communicated?
Practical questions.
We communicate design intent and quality standards to the construction trades, who then do their level best to build as efficiently as possible the thing it appears everyone wants.
What’s the big picture?
What’s important?
What’s the detail look like?
Just what are we trying to accomplish?
When these things are clear – to us, to our clients, to our builders – a project clips along nicely.
Dimensioning starts and ends with intent, and intent suffuses – or should – every part of our documentation.
So we do drawings. We strive to make the documents perfect, complete, and beautiful.
To better communicate with the various trades, we sub-divide our drawings into corresponding subsets: architectural, electrical, structural, hvac, plumbing. The architectural subset is similarly sub-divided: framing, cabinets, finishes, details.
Why? To get clear with the person or the people in the field: as if we were to take a hard-working carpenter aside for a moment and have a heart-to-heart about how to put that corner together, why it’s important to do it in the way described, and why it needs to be just so.
Instructions vs Explanation
Designers and architects tend to look at a dimensioned drawing and think “How nice. How thorough. Everything labeled. Everything in its place.” Architects and designers see the configuration first; usually a configuration we’re proud of and which represents for us a lot of careful work.
By contrast, builders see Marching Orders. Instructions where to put something. A potential failure point.
The abstract thinking documented with numbers and lines on our paper represent real humans pushing, cutting, and setting materials into place according to our instructions, using tools and techniques developed over tens or hundreds of years. Or thousands: even today the very first action on a building site is the driving of a stake in the ground, in the right place, at the right elevation. An act that goes back millennia.
Placing dimensions is equivalent to leading a squad of artisans. To lead a squad well, you better know the squad’s business or you’ll be made a fool in no time.
Accuracy and Intent
The sure sign of a novice is accuracy misplaced. An experienced hand knows what level of accuracy is relevant and appropriate for the work being described. With experience light and smart gets easier, you’re able to concentrate on what is essential to get the job done and ignore and avoid the dross.
Science vs Art
Measuring to an appropriate level of accuracy – the appropriate number of significant digits – is an ongoing project for scientists and mathematicians, and the construction trades suffer the same dilemma. But we as designers have a huge advantage over the scientists: Architects establish dimensions according to intent.
In a way, the core function of a scientist is to measure to better understand a natural or artificial system or object. The accuracy of scientific rulers is paramount.

By contrast, the core function of an architect (in a way) is to establish a reference value, and the degree of accuracy required, then leave it to the builder to measure and execute the intended configuration. (The musical analog goes something like: composer establishes a metric to order the composition, and leaves it to the musician to “measure” and execute the intended notes.) The accuracy of our intentions are what matter. (Can an intention be “accurate”? or just “clear”? I dunno. Probably the just latter.)
Scientists proceed from measurement to understanding, architects from intent to measurement. We are small-c creators of our own small-w worlds. Scientists attempt to reverse-engineer and understand the ‘fearful symmetry’ of Creation itself. So everyone from God on down has a compass and a ruler.
How other disciplines grapple with “measurement”
In other disciplines, measurement carries meaning. Astronomers may have beaten architects to the punch in terms of measuring stuff – but architects quickly learned to incorporate the astronomer’s lessons into their building designs. (OK – we have indeed gone off the rails here. We can talk about the celestial soffit another time.)
scientific measurement
significant digits
musical intervals
rhythmic intervals
significant digits in mathematics
design & order
Thinking about systems with care and clarity will help reduce errors in construction, maybe even eliminate a tragic outcome.
Architectural Accuracy
OK so this is all a long way of saying: “show dimension precisions of less than 1/2 inch at your peril.” Always be accurate, and learn when and where to deploy an appropriate level of precision. Which is different. Which you know if you followed any of the above links.
Aphorisms
From the book Measuring, Marking, and Layout, the Builder’s Guide. A book we have in our library. These “ground rules for framers” transfer nicely to thinking about the preparation of technical documents, I think:
- see it before you build it
- work from critical to non-critical dimensions
- avoid cumulative error
- work within practical tolerances
- re-adjust and straighten out periodically
- think modularly
- look for simple solutions
- work in a logical sequence
- be consistent
- learn from your mistakes
Application
String Theory
Dimension strings organize into discrete types. A typical condoc drawing will have some of each. Each of these string types has a one-to-one relationship with it’s target elements – don’t mix the types on a single string.
Aside: A core ArchiCad aphorism is “model it like you build it”. Dimensions attach to parametric elements of the model. As the model changes, so follow the dimension strings. I was taught by one of my mentors to “dimension as you go”. Keep the numbers in mind, dimension as you design, even when sketching.

The daily practical import of this is: “know what you’re dimensioning”. Slabs? Walls? Cabinets? A text element or fill? Make sure the associative dimension is actually associated consistently with the correct model element. (Tip: use the tab key.) Different strings adhere to different elements of the building. Different elements of the building come with their own very-well-worked-out standards of acceptable precision. Learn the difference between your understandable expectation of perfection and how a thousand years of putting buildings up has refined the definition of “good enough”.


String Taxonomy
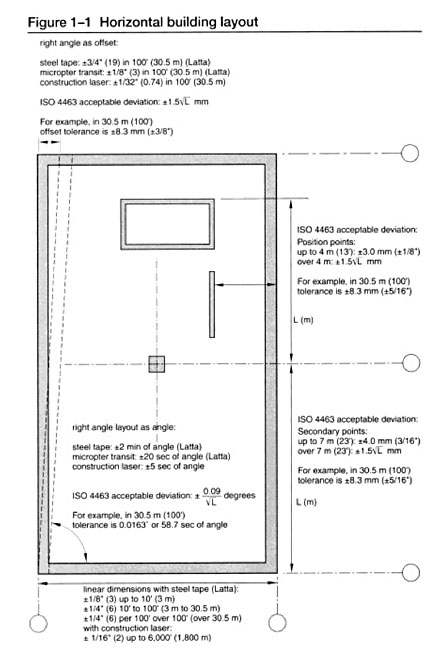
Overall dimensions
- size of site
- location of building on site
- overall dimension of building
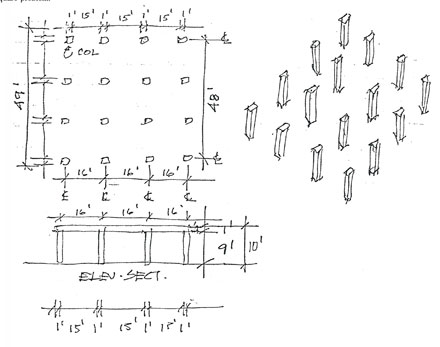
Structural gridlines
- column grid
- references back to column grid
- layout lines and work lines, other regulating lines
Masonry Wall structure
- overall wall dimensions based on masonry modules
- offsets
- openings in walls based on masonry modules
Frame wall dimensions
- overall wall dimensions (advanced framing techniques prefer a 24” module)
- offsets
- openings based on centerlines – especially windows
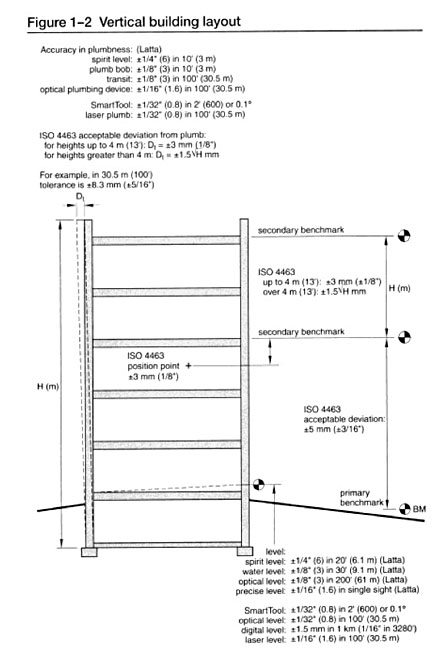
Sectional (vertical) dimensions
- overall height
- height of set-points (footing, slab, plate, subfloor, top of wall, etc.)
- height of finishes (typical ceiling, offsets, railings, cabinet heights, etc.)
Finish dimensions
- dimension cabinets to face of wall structure
- dimension finishes from core or structure or gridline
Miscellaneous dimensions
- stair sections
- blocking in wall
- rough openings
- details
Execution
General Techniques
- Dimension strings, especially exterior dimension strings, tend to come in groups of three: the overall, the offsets, the holes. Space chains 1/4″ from each other.
- Graphic clarity is extremely important: sorting out the plan graphic elements is expected and required. You will need to move strings and numbers around a bit to make them clear. Delete redundant segments.
- Dimension from general to specific. For an exterior string, start with overall outside-corner strings. The project could sit with these for a long time – only after the overalls are set will it be OK to draw the next string in – the offsets in the exterior wall. And so forth. A common beginner’s error is to dimension random interior elements with a high degree of precision without reference to the overall. In schematic design there is no need for long complex strings of dimensions.
- Dimension consistent with design intent.
- Historically, especially with interior strings pertaining to partitions, only one side of the partition need be dimensioned.
- On plans we typically do not dimension to the faces of finish surfaces, only to the framing. However, at the level of a 3″=1′ detail, we do dimension to the face of a finish, or show the total depth of the finish layers in the detail. Practically speaking the thickness of finishes is almost never important. Sometimes, but usually we let the finish thickness float a bit as the actual finish specification is finalized.
- Where strings intersect walls the witness line length should be zero.
- Dimension partitions within the plan, not at the outside strings.
- Dimension all columns to CL.
AC-Specific Techniques
- Dimension to core only. Click on wall lines, not corners.
- Dimension to the correct elements. Any particular corner in a model might bring to the same point the corner of a roof, wall, slab, cabinet, masking fill, zone, ceiling, or trim element. Make sure you’re associating with the appropriate model element.
- Learn how to edit strings. Within a chain you can easily insert new points, delete points, delete a chain, or merge one chain with another. Easy. Once you know how. Strings should be unified, not a series of touching segments.
- Drag the dimension texts side to side as necessary to get them clear of other elements, including other dimensions.
- Fix the model as you go. Dimensioning always reveals some problems. The dimension tolerance should be set to 1/8″, but in practice eighths should be rare. Make sure any displayed eighths are genuine.
- The auto-dimensioning tool is a wonder when used properly.
Vocabulary:
- String. Overall dimension element. (Select at line.)
- Tick. Dimensioned points. (Select directly.)
- Witness Line. Line perpendicular to the string, aimed at dimensioned point. (Edit through the tool dialog or pet palette.)
- Segment. Substring between two adjacent ticks. (Select at midpoint.)
- Dimension Text. The numbers. (Enter your own text (why?), generate automatically, or append auto-text descriptor.)